+86-769-33269015/81779096

DONGGUAN REFINE SILICONE PRODUCTS CO., LTD
Add:LIJIAFANG INDUSTRIAL ESTATE,SHIPAI TOWN ,DONGGUAN CITY GUANGDONG PROVINCE 523336 CHINA
Sales Manager:Cecilia Chen
Tel:86-769-33269015
Fax:86-769-81779096
E-mail:
sales@siliconefactory.com
By Athena Hessong, eHow Contributor
Read more: How to Remove Grease From Silicone Bakeware | eHow http://www.ehow.com/how_5594903_remove-grease-silicone-bakeware.html#ixzz2TnmCG1Sq
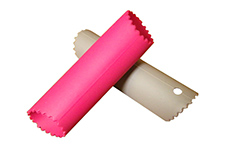
Foods do not stick to silicone bakeware, even without cooking spray, but some recipes require you to apply cooking spray or oil to the inside of the pan. Once you have finished cooking, you must remove this greasy residue. You do not have to follow this entire cleaning regime; once your pan no longer feels greasy, stop the process.
Instructions
1Soak the silicone pan in soap and warm water for 10 minutes. Rinse thoroughly and dry completely with a towel.
2Place the pan in the dishwasher and run the machine as usual, if soaking the pan in water does not remove the grease. Remove the pan from the dishwasher once the cycle finishes and rinse the pan with warm water. Dry with a towel to remove any white residue from detergent.
3Rub your hand on the inside of the pan. If you still feel grease, fill a saucepan halfway with water. Pour white distilled vinegar to completely fill the saucepan. Place the saucepan on the stove over medium-high heat and bring the water-and-vinegar mixture to a boil.
4Turn the heat down to medium and place the silicone pan in the boiling water. Hold down the silicone pan with a wooden spoon if it floats to the top of the saucepan. Boil the silicone pan in the vinegar and water for 10 to 15 minutes to remove all residual grease and scorch marks. Remove the silicone pan from the water and dry completely before storage.
 2227361358
 refinesales.exportrefine.export
 refinesiliconecn1501335257
 +86-769-33269015